Step 1: Creating a cPanel account for WHMEasyBackup Installation.
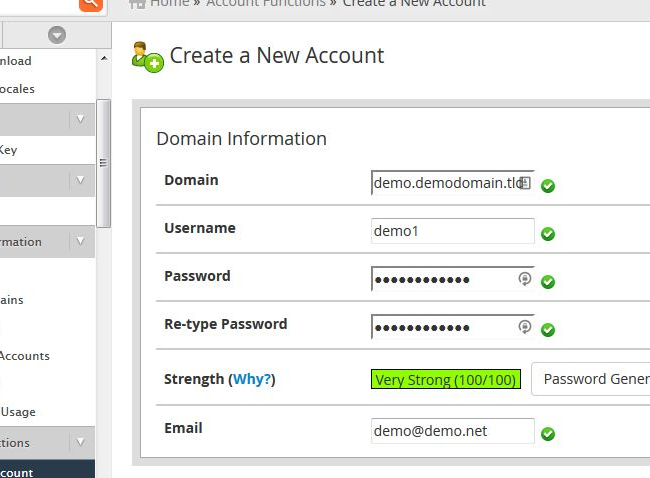
WHMEasyBackup can be hosted on any hosting environment with IonCube and Curl support. However, creating a separate account specifically for WHMEasyBackup is recommended. A valid domain/subdomain is not required but can be beneficial when testing.
Step 2: Creating the install folder and uploading core files.
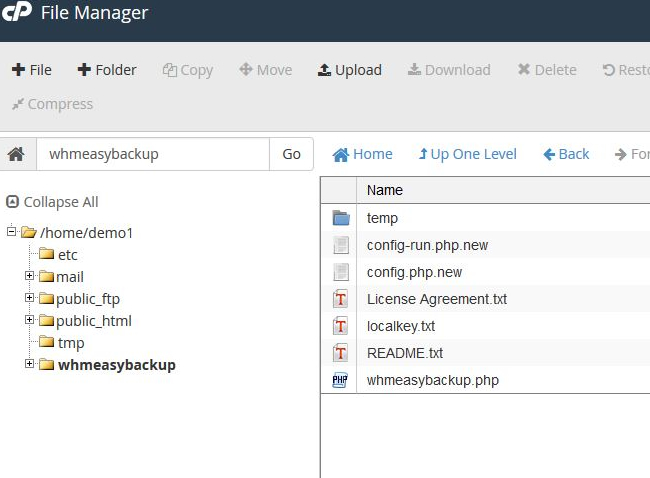
Create an install folder within the root of the newly created account (the folder ”whmeasybackup” is used in the example above). Upload WHMEasyBackup files (and the temp folder) to the install directory. In most environments default file permissions are acceptable for normal operation, however if php runs as a shared user (nobody, apache, etc.) you will need to chmod the temp folder and localkey.txt file with 777 permissions.
Step 3: Creating a config file.
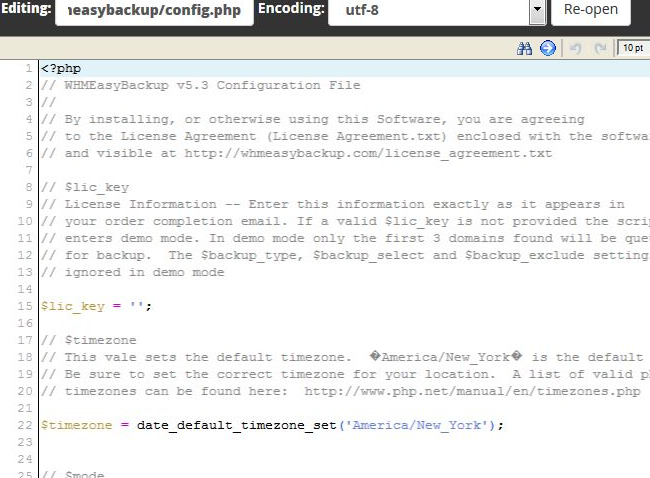
Copy the config.php.new template and rename the file with a php extension (config.php for example). Config files can be named anything you like and any number of config files can be created within a single WHMEasyBackup installation.
Open ”config.php” in the file manager code editor and edit the file as needed. The config file template is heavily commented to assist in the setup process.
Open ”config.php” in the file manager code editor and edit the file as needed. The config file template is heavily commented to assist in the setup process.
Step 4: Verifying PHP Settings.
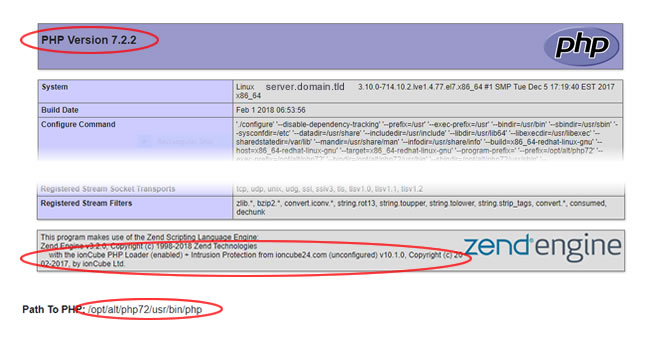
Upload the phpinfo.php file included in the install files to the public_html folder of the account hosting WHMEasyBackup. There are three things to note here: 1). The current php version 2). The IonCube version supported 3). The path to PHP.
The default whmeasybackup.php file is designed to function with php 5.6 and 7.0 with IonCube version 10 or newer. If you are running php 7.1/7.2 with IonCube version 10 or newer, replace the standard whmeasybackup.php file with the file located in the “Fix_For_PHP_7.1_and_7.2” folder.
The default whmeasybackup.php file is designed to function with php 5.6 and 7.0 with IonCube version 10 or newer. If you are running php 7.1/7.2 with IonCube version 10 or newer, replace the standard whmeasybackup.php file with the file located in the “Fix_For_PHP_7.1_and_7.2” folder.
Step 5: Creating schedule crons.
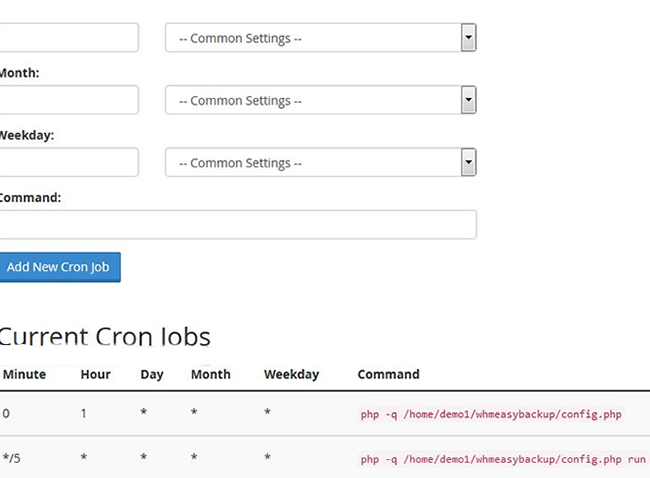
Each WHMEasyBackup configuration file requires the creation of two cron jobs (scheduled tasks) in order to function. Use the full path to php from Step 4 when creating your cron jobs.
** Build Cron **
The first cron is the ”build” cron. The build cron queues accounts for backup based on config file settings and schedules the frequency of your backups. For daily backups, the build cron should be configured to run once per day, for weekly backups once per week and so on.
Example Build Cron Command:
/your/full/path/to/php -q /home/user/whmeasybackup/config.php
** Run Cron **
The second required cron is the ”run” cron. The run cron processes the queue created by the build cron. This cron should run every 5, 10 or 15 minutes. Triggering the run cron every 5 minutes is recommended, however if the cPanel accounts queued are large in size (2GB +) it may be necessary to schedule the run cron at 10 or 15 minute intervals.
Example Run Cron Command:
/your/full/path/to/php -q /home/user/whmeasybackup/config.php run
Special Note for running with register_argv_argc disabled. With the argv array disabled, you'll need to create a ”run” config using the config-run.php.new template. Once your run config has been created, please adjust your ”run” cron as follows:
Example Run Cron Command:
/your/full/path/to/php -q /home/user/whmeasybackup/config-run.php
Be sure to adjust the file paths as needed for your installation.
Step 6: Reviewing log files.
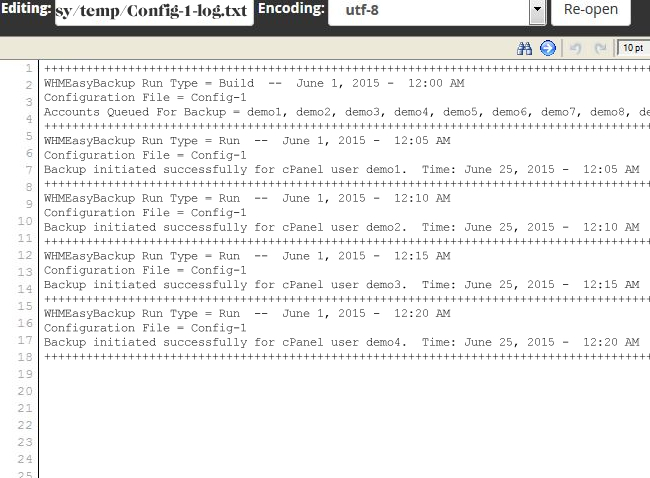
WHMEasyBackup logs are stored in the temp directory. Each config file generates its own log file ($configname-log.txt). Be sure to review log files during the initial setup process, any errors or notices that may effect operation will be listed there.
Follow the special setup instructions from Step 5 if your build entries include the following notice:
*** Notice: register_argc_argv is disabled. ***
Follow the special setup instructions from Step 5 if your build entries include the following notice:
*** Notice: register_argc_argv is disabled. ***

